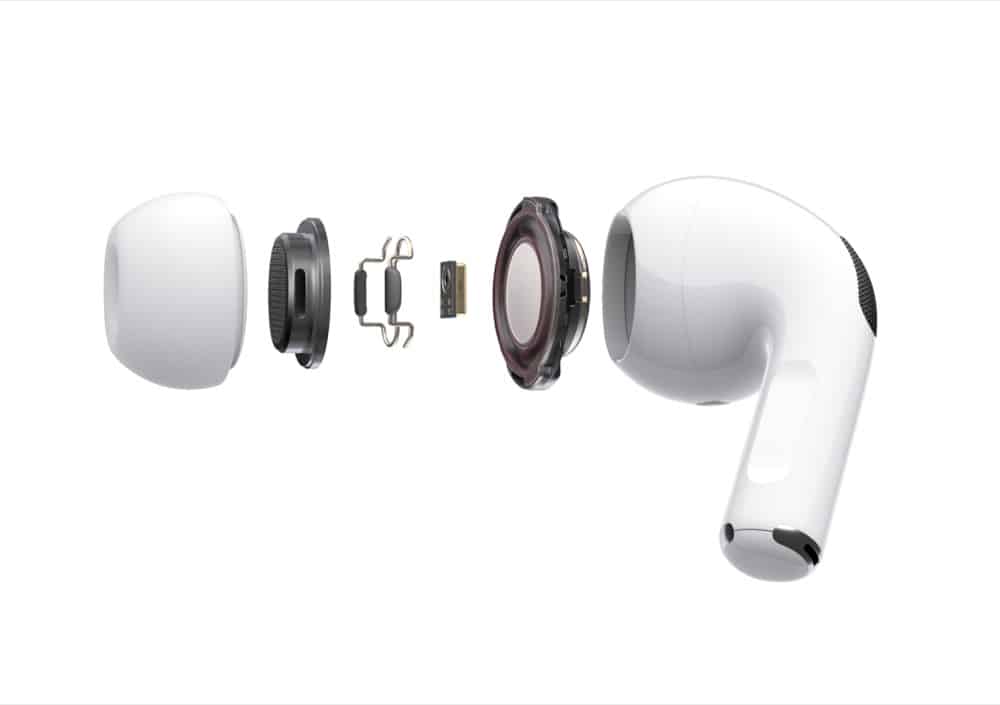
The AirPods Pro are the best wireless earbuds on the market – but you can take them even further with these AirPods Pro tips.
Apple’s AirPods Pro are honestly the best audio accessory Apple has ever made. They sound better, they charge faster, and they’re more comfortable.
You can read our complete AirPods Pro review here to find out everything we think about them.
But if you’ve already got a pair, you might not realize that there are a ton of hidden tips and tricks to using them. Here are the AirPods Pro tips and tricks you need to know.
#1 Press, Don’t Tap, Your AirPods Pro
Apple’s first two generations of AirPods had tap controls. You simply tapped a finger on the bud part of the AirPods to activate actions–such as skipping to the next song. However, the new AirPods Pros do away with tap interfaces in favor of presses on the “Force sensor.”

The Force sensor is the indignation on the step of each AirPods Pro. When you physically press it an action will occur depending on how many times you press it. Here’s how the Forse sensor controls work:
- Single-press: Pause or play your music/podcast/etc.
- Double-press: Skip forward to the next track in the playlist.
- Triple-press: Skip backward tot he previous track in the playlist.
- Long-press: Press and hold the stem to switch between noise cancellation and transparency mode.
#2 How To Enable Active Noise Cancellation
The AirPods Pro Active Noise Cancellation, or ANC, is the standout feature of the new buds. AirPods Pro ANC is insanely good. Most people know you can activate it with a long press on the AirPods Pro stem (see above), but some people find it easier to do another way.
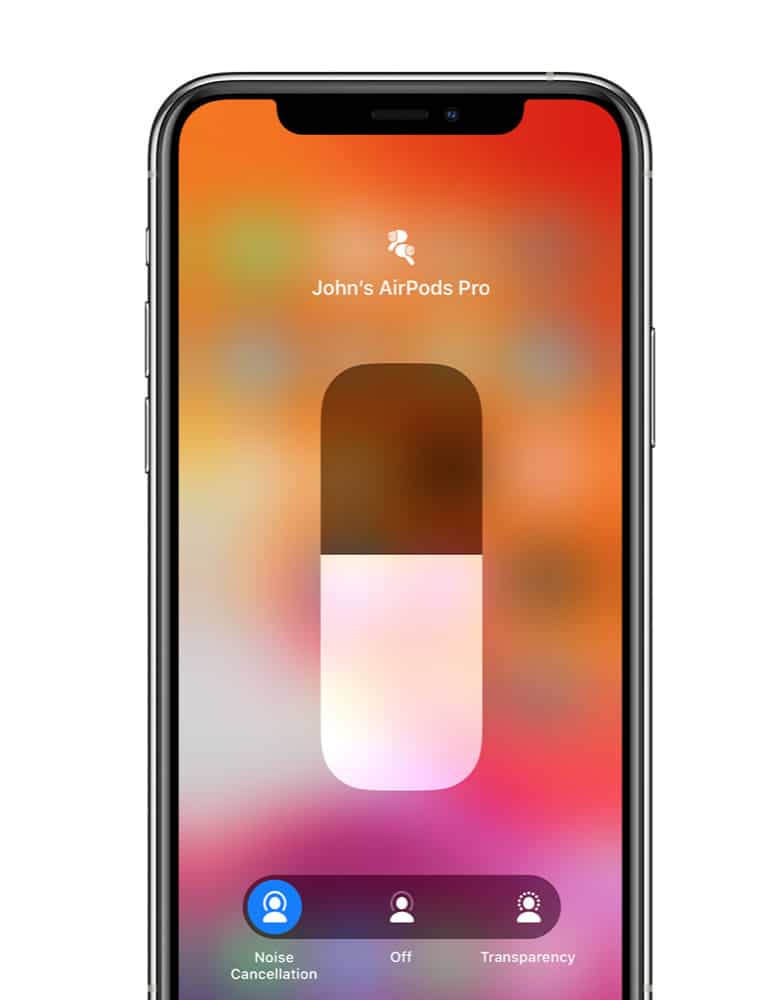
This other way is by using your iPhone. To do this, follow these steps:
- Open Control Center on your iPhone by swiping down from the top-right of the screen (iPhone X and later) or swiping up from the bottom (iPhone 8 and earlier).
- Long press on the volume indicator for the AirPods Pro (make sure your AirPods Pros are connected!).
- At the bottom of the screen that appears, tap the “Noise Cancelation” button in the slider.
#3 How To Use Transparency Mode
AirPods Pro also has another mode in addition to ANC called “Transparency Mode.” Transparency Mode allows you to temporarily let outside noise in through your AirPods Pro even when ANC is engaged. This is helpful in situations when you need to hear an announcement, such as on a plane or on the train platform.
While you can engage Transparency Mode via a long press (see above), you can also engage it using your iPhone. Here’s how:
- Open Control Center on your iPhone by swiping down from the top-right of the screen (iPhone X and later) or swiping up from the bottom (iPhone 8 and earlier).
- Long press on the volume indicator for the AirPods Pro (make sure your AirPods Pros are connected!).
- At the bottom of the screen that appears, tap the “Transparency” button in the slider.
MORE: The #1 Best AirPods Alternatives RIGHT NOW (Budget & Premium Options).
#4 Don’t Forget To Use The Ear Tip Fit Test
One of the best features of the AirPods Pro is that they come with three interchangeable ear tips so you can get the best fit for your ears. However, being Apple, they’ve done something more ingenious than just telling you to try all three tips to see what works best.
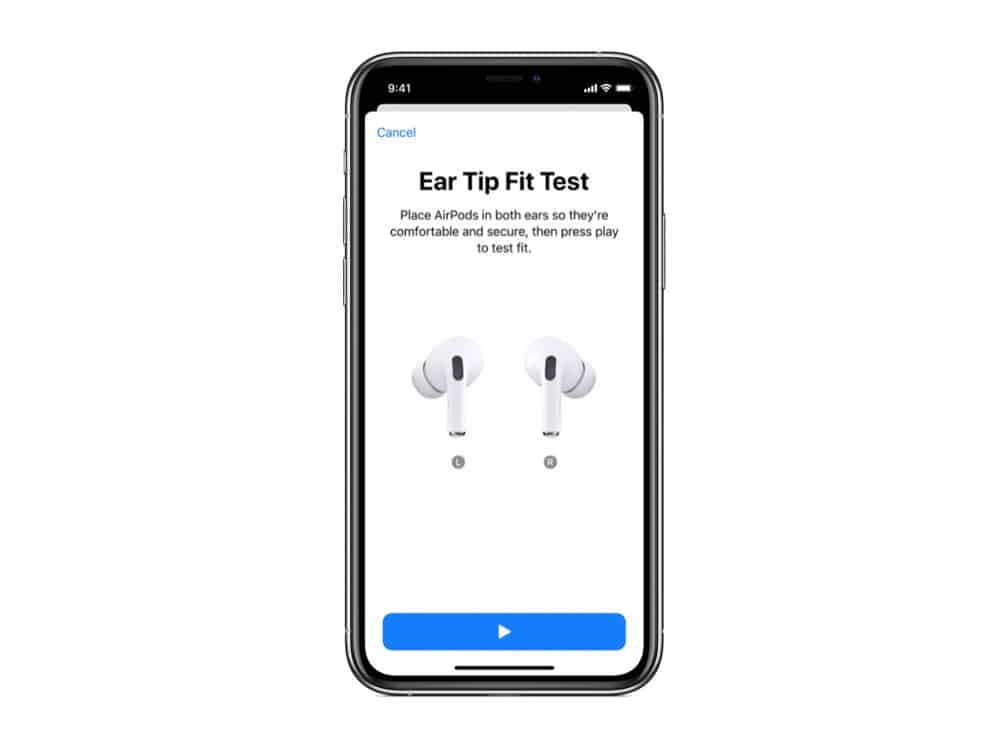
The company has built-in an Ear Tip Fit Test to the AirPods Pro that will tell you if the chosen tips give you a good seal in your ears, which will help block out the most external sounds. To run this test, do the following:
- With your AirPods Pro in your ears, on your iPhone, go to Settings > Bluetooth.
- Tap the info button next to your AirPods Pro in the list of Bluetooth devices.
- Tap Ear Tip Fit Test.
- Tap Continue on the explanation screen that appears and then tap the Play button on the next screen.
After the sound plays the screen will tell you if your chosen ear tips are a good fit or if you should try another one.
#5 Have Siri Announce Your Messages
Another cools feature of the AirPods Pro is that they can read your incoming messages aloud to you without you needing to do anything. This is great when you are on a run and don’t want to pull out your phone to see who texted you. To take advantage of this, simply do the following:
- Open the Settings app on your iPhone.
- Tap Notifications, and then tap Announce Messages with Siri.
- On the next screen, toggle the Announce Messages with Siri switch to ON (green).
Apple is sure to add more cool software features to the AirPods Pro with time. As they do we’ll keep this list updated, so check back often!
#6 Tap The Case To Check Wireless Charging Status
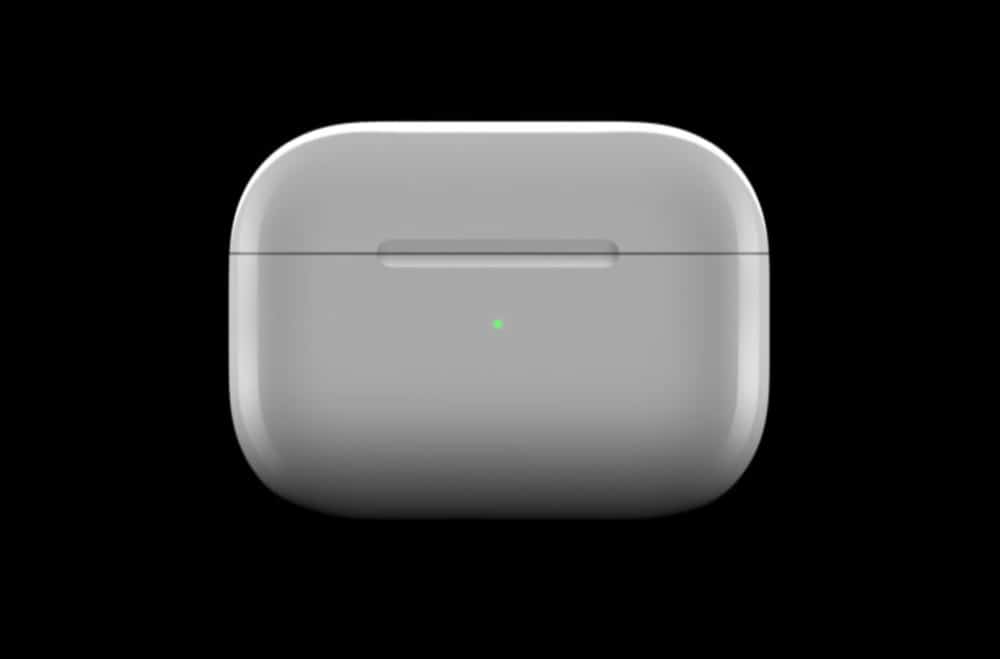
Another cool feature about the AirPods Pro is that every set comes with a wireless charging case. Of course, you can still plug the case into a Lightning cable to charge it up, but the fact that it’s wireless too is nice because it future-proofs the case should you ever choose to invest in a wireless charging pad.
When you’re wirelessly charging the case (and AirPods Pro inside) you don’t need to pick up the case and open the lid to check the status of the charge–you can check the status just by touching it. Here’s how:
- With the charging case face up on a charging mat, tap the case with your finger to make the charging indicator light on the front of the case to come on.
- An amber color means the case is still charging and a green color means the case is fully charged.
#7 Connect Two AirPods Pro To One iPhone
A really cool feature of Apple’s latest AirPods is that you can connect two sets of them to one iPhone. This means two different people can each use their own AirPods Pro to listen to the same music from one iPhone. This is great for a couple who are traveling together on long flights. Of course, this isn’t just perfect for music-listening, but for two people watching the same video on one iPhone.
Here’s how to connect two pairs of AirPods to one iPhone:
- Put in your AirPods Pro and make sure they are connected to your iPhone.
- Start playing the media you want to listen to.
- Launch Control Center on your iPhone and in the audio controls box, tap the triangle with three circles button.
- Now with your friend’s AirPods Pro, bring them near your iPhone while still in their closed case, then open the lid of the case.
- A prompt will appear on your iPhone asking you if you want to share your iPhone’s audio with the AirPods Pro. Tap Share Audio.
#8 Change Force Sensor Duration
As you’ve seen in tip #1 above, the AirPods Pro uses force sensors on their stem to control things like noise cancellation and music playback. You can actually change the length of time you need to press the force sensor before it activates a specific action. This is good if the force sensor currently feels too slow or rapid.
- Open the Settings app on your iPhone.
- Tap Accessibility.
- Tap AirPods.
- Under the “Press and Hold Duration” heading, select Default, Short or Shorter.
#9 Find A Lost AirPods Pro
The AirPods Pro are great because they’re so tiny. But that also means they are easy to lose. Thankfully they can be just as easy to find thanks to the Find My app in iOS 13 and later. Here’s how:
- Open the Find My app on your iPhone (or iPad).
- Tap Devices at the bottom of the app.
- Find your AirPods Pro in the list of devices and tap it.
- On the AirPods Pro screen, you’ll see a map of its last known location. If you’re in that location you can then choose “Play Sound” and your lost AirPods Pro will emit a sound that helps you locate it.
#10 Check Your AirPods Pro Battery Life
One of my favorite things about the AirPods Pro is you can check their battery life without looking at your iPhone – are taking them out of your ears! If you’re wearing them, simply ask Siri by saying “Hey Siri, how’s my AirPods’ battery?” Siri will answer by stating how much battery life is left in both the right and left AirPods Pro individually. If you want more Siri tips be sure to check out 66 Siri Commands You Should Totally Know.
#11 Check The AirPods Pro Wireless Charging Status
All AirPods Pro come with a wireless charging case that works with most Qi-compatible charging mats. Simply lay your AirPods Pro case (with the AirPods Pro inside) on the charging mat to commence wireless charging. When you place the case on the mat you’ll see the amber charging light on the case turn on briefly before shutting off.
To check on the charging status later you don’t need to pick up the case and then set it down again (or even open it up). Instead, gently tap the charging case while it’s on the wireless charging mat. If the light is amber the AirPods are still charging. If it’s green the AirPods are fully charged.
#12 Change Noise Controls Via Your Apple Watch
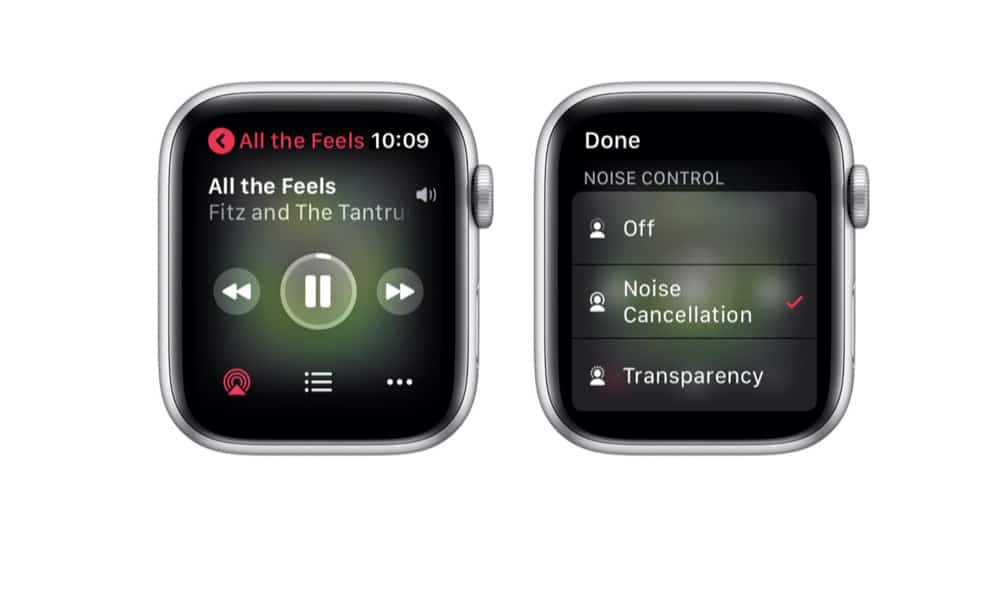
The AirPods Pro lets you change between three noise control settings: off, noise cancelation, or transparency. You can cycle through these settings by pressing the step of the AirPods Pro or access them on your iPhone. But Apple Watch owners can also change them on the device’s tiny screen.
To do so, make sure your AirPods Pro are in your ears and music is playing from either your connected iPhone or Apple Watch. Now on your Apple Watch access the Now Playing screen. Tap the icon of the triangle with three circles. Now tap your AirPods Pro in the device list. Finally, tap which noise control setting you want to enable.
#13 Make Your iPhone Into A Microphone
You can actually use your iPhone as a microphone if you have AirPods Pro. Pretty crazy, right? This is very helpful if you are hard of hearing and are at a desk or table with someone who is speaking, but you aren’t close enough to them to hear everything. By turning your iPhone into a microphone you can slide it closer to them and listen through your AirPods Pro. Here’s how to set this up:
- On your iPhone, add the Hearing shortcut to Control Center by going to the Settings app and tapping Control Center > Customize Controls. Now tap the + next to Hearing.
- Once you’ve done the above, swipe to bring up Control Center on your iPhone.
- Tap the Hearing shortcut.
- Now tap Live Listen.
- Now just slide your iPhone close to the speaker and you’ll be able to hear what they say through your AirPods Pro.
#14 Connect Your AirPods Pro To An Android Smartphone
While the AirPods Pro works best with iPhones, you can use them with Android phones too. However, note that you won’t get all of the features of the AirPods Pro (like many of the tips in this article) when using them with an Android. Still, you’ll be able to listen to your tunes.
- To use your AirPods Pro with an Android phone:
- Open the Bluetooth setting on your Android device.
- Tap Pair a New Device.
- Now open the AirPods Pro case to enable pairing.
- Back on your Android tap to confirm the pairing.
If for some reason your Android isn’t picking up the AirPods Pro, press and hold the button on the back of the AirPods Pro case until the light on the case flashes. This should make the AirPods Pro discoverable.
Also, be sure to try this if your iPhone microphone is not working. And here’s how to connect AirPods to a Mac! And be sure to check out Do AirPods Affect Your Hearing?

