If you have a new Amazon Fire Tablet and you haven’t used one before, you might be wondering how to set it up correctly. This guide will show you how…
Set-Up Guide: Getting Started…
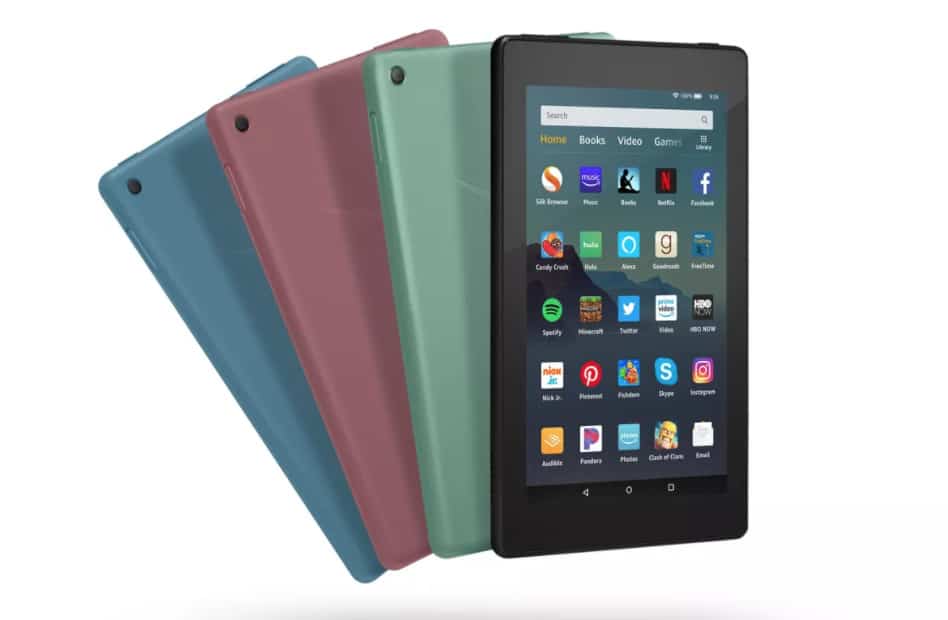
Once you’ve unboxed your new Amazon Fire tablet, you’ll need to switch it on. Click the power button, located on the side of the device, and hold it until the Amazon Fire boots up. It usually only takes a few seconds. Once the tablet has booted up, you’ll be asked to choose a language – pick one and proceed.
Related Stuff For Your Amazon Fire Tablet:
Next, you’ll be asked to connect the Amazon Fire tablet to a WiFi network. Again, this is simple: just select your home WiFi network from the list, enter the password, and the Amazon Fire tablet will connect to your home network. Once the Amazon Fire tablet is connected, it will first check for updates.
If there are new updates for the Amazon Fire tablet available, you might as well download them and install them on the tablet. You want to always be running the latest software, as it keeps everything up to date and protects you from security flaws and issues and known bugs contained in older versions of the software.
Sign-In With Your Amazon ID
Next, you’ll be asked to sign-in using your Amazon ID. If you don’t have an account with Amazon, follow the link displayed to set one up – and you will need an Amazon ID to run the Amazon Fire tablet, so do not skip this step. If you already have an Amazon ID, enter your email and password.
Location Services
Once you’ve signed in with your Amazon ID, the next screen will cover location services for the Amazon Fire tablet. Location services are useful in certain scenarios, but they aren’t essential; if you don’t want Amazon knowing where you are when you’re using the Amazon Fire tablet, select OPT-OUT.
Next, you’ll be asked if you want to set up BACK UP AND RESTORE. It is highly advisable to do this. If you lose the Amazon Fire tablet or something happens to it, all of your accumulated data will be stored on Amazon’s cloud, so you can access it on the web and inside a new Amazon Fire tablet, should you get one.
Adding Multiple Users To Your Amazon Fire Tablet
The Amazon Fire tablet has the ability to have profiles for more than one person. Once you’ve completed the back and restore section, you can add in different user profiles on the device. This will ensure that when someone other than you uses the Amazon Fire tablet they’re not seeing your data and information. If you have kids or other family members that will use the tablet, it is 100% worth setting up profiles for them.
On The Subject of Kids…
Amazon provides a completely unique child account option on the Amazon Fire tablet. The child profile for the Amazon Fire tablet looks completely different from the standard user profile. It also blocks off certain things, has a kid-safe web browser, and it limits what they can see and do. You also cannot make payments inside a child profile without adult confirmation. If you have kids, and they use your Amazon Fire tablet, you NEED this feature.
Getting Started With FireOS
Amazon’s Fire tablets run on Android. But it is a forked version of Android called FireOS, so while the source code is similar to what you find on Android phones, the actual UX looks and functions quite a bit differently – and there is no Google Play Store as well (more on that in a bit).
The good thing about the Amazon Fire tablet is that it gives you a fairly detailed overview of how to use FireOS, once the tablet boots up. Make sure you watch the on-screen video, as it will show you how to add applications, how to move applications around on the screen, and guide you on how to do other basic tasks and processes. It’s all very simple, so don’t stress it.
Along the bottom of the screen, you’ll find three icons: the middle one is Home; if you click it you’ll be taken back to the home screen from anywhere in the operating system. The left button is back; click the back button to move backward in menus and apps. The right button is for the app switcher; if you click the square icon it will show you your most recently used apps.
Need to find Settings on the Amazon Fire tablet? Just swipe down from the top of the screen and click the settings cog for access to things like Bluetooth, display brightness, date and time, and other settings for the Amazon Fire tablet. Inside Settings, you’ll find loads of options for customizing your Amazon Fire tablet. Have a look at them and see which are relevant to you.
Is Google Play Available For Amazon Fire Tablet?
Because the Amazon Fire tablet runs on Amazon’s custom FireOS and Amazon, like Apple, likes to keep its users inside its walled garden, there is no support for Google Play on the Amazon Fire tablet. Instead, you have to use Amazon’s App Store. But don’t worry, nearly all of the most popular apps are present and accounted for inside the Amazon Apps Store. Is it better than Google Play? Hell no! But it is good enough, so don’t stress it too much.
You cannot download any of Google’s core applications, however, and, sadly, that includes YouTube, Chrome, and Gmail. Why? Google hasn’t released them inside the Amazon App Store, likely as a punishment to Amazon for not using the Google Play Store on its tablet devices. If you want to watch YouTube, you have to do it through the built-in browser.
How To Set Up Email on The Amazon Fire Tablet
Setting up email on the Amazon Fire tablet is fairly simple. Just click the email icon on the screen and select the type of email account you want to add. FireOS supports all major email platforms, including Gmail, Outlook, and Yahoo. Apple accounts, however, are not supported. But I’m guessing if you have one of those, chances are you probably use an iPad anyway…
If you run into issues setting up an email account, or you get an error message, you might have to check the server settings for your email, switch off two-factor authentication, or reach out to the email provider to troubleshoot the problem for you. Most of the time, this will not be an issue – especially if you’re using Gmail, Yahoo, or Microsoft email.
FireOS also supports multiple email accounts, so can add as many as you like. If you want personal and business email accounts on the device, you can do this – just follow the steps you went through to add the first email. Then, once the email addresses are added, you will be able to switch between accounts inside the Amazon Fire’s email app.
Best Apps For Amazon Fire Tablet
If you’re brand new to FireOS, here’s a selection of apps to check out once you have everything set up correctly.
- Spotify
- Netflix
- AP Mobile
- Colorfy
- Goodreads
- Monument Valley
- Minecraft
- NordVPN
- Plex
- Podcast Addict
- VLC Media Player

