Your smartphone – whether Android or an iPhone, new or slightly older – has an amazing camera inside it. In this guide, we’ll explain all your smartphone’s camera settings and how to use them like a pro…
Table of Contents
Whether you’re using an iPhone or an Android phone from Samsung, the camera technology you have in your pocket is mind-blowing. Just think how far we’ve come inside the last half-decade. Go back 10 years and the evolution of smartphone camera tech is breathtaking in how quickly it has advanced.
Most people, including myself, however, never really take advantage of all the latent performance and settings available to them inside their smartphone. Both Android and iPhones come with myriad customization options that allow you to get significantly better looking images from your phone.
And if you’re anything like me, the reason you haven’t looked into this probably is either A) you’re a bit lazy and can’t be bothered, or B) you’re worried that it will be too complicated. The truth of the matter is that, yes, the tech that makes your phone’s camera work is complicated but learning how to harness it actually isn’t.
In this guide, we’re going to go over the absolute basics – stuff like white balance, HDR, ISO levels, and exposure. Get a handle on these things, understand how they work, and your photography will instantly look 10X better. Trust me, I just spent a good month learning all this stuff.
That’s enough for the preamble, let’s get you up to speed with some of your smartphone’s more nuanced and interesting features and abilities…
Your Phone’s Camera Settings Explained
What is Exposure?
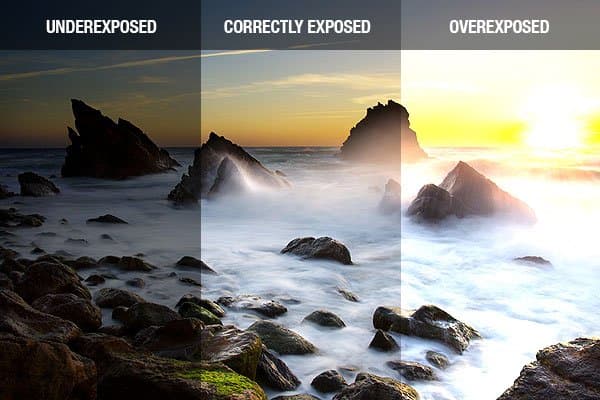
Exposure is the amount of light that reaches your camera sensor. It’s a fundamental concept in photography and is crucial to capturing great photos.
When you take a photo, your camera’s sensor is exposed to light. If too much light hits the sensor, your photo will be overexposed, and it’ll look too bright. Conversely, if not enough light hits the sensor, your photo will be underexposed, and it’ll look too dark.
Most smartphones automatically adjust the exposure for you, but you can also manually adjust it in your camera settings. This is particularly useful in tricky lighting situations, such as when you’re shooting in bright sunlight or in low-light conditions.
To manually adjust the exposure on your smartphone, look for the exposure compensation setting in your camera app. This is usually represented by a +/- icon. By sliding this up or down, you can make your photo brighter or darker.
Remember, the key to good exposure is balance. You want enough light to clearly see your subject, but not so much that it washes out the details.
What is HDR: High Dynamic Range Photography?
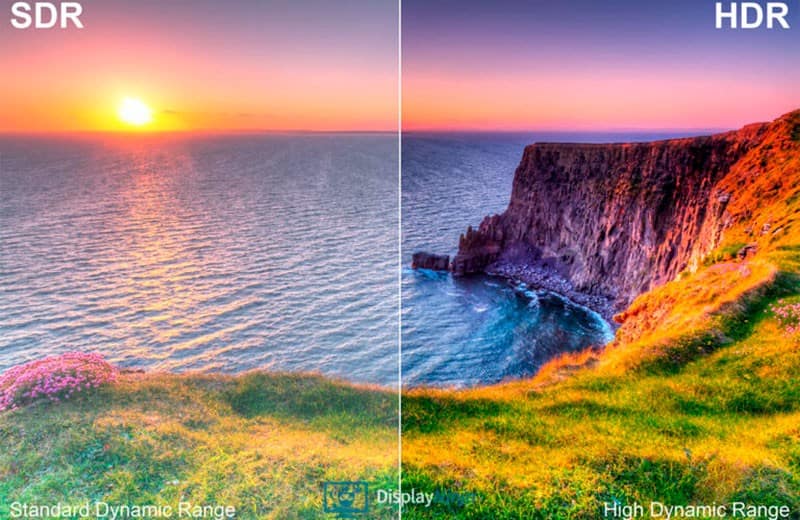
High Dynamic Range, or HDR, is a setting available on most smartphones that can dramatically improve your photos. But what exactly does it do?
In photography, dynamic range refers to the difference between the darkest and lightest tones in an image. In real life, our eyes can see a much wider range of light and dark than a camera can capture in a single photo. This is where HDR comes in.
When you enable HDR on your smartphone, your camera will take multiple photos at different exposure levels when you press the shutter button. It then combines these photos into one image. The result is a photo that better represents the range of light and dark that your eyes can see.
HDR is particularly useful in high-contrast situations. For example, if you’re taking a photo of a landscape with a bright sky and dark foreground, HDR can help balance the exposure so that details in both the sky and the foreground are visible.
However, HDR isn’t always the best choice. It can sometimes make photos look unnatural or overly processed. Additionally, because HDR requires taking multiple photos, it can cause blurring if your subject is moving or if your hand shakes. Therefore, it’s best to use HDR judiciously.
To enable HDR, look for the HDR setting in your camera app. Some smartphones offer an auto-HDR mode, which will decide for you when to use HDR based on the lighting conditions.
ISO: Controlling Your Camera’s Sensitivity to Light
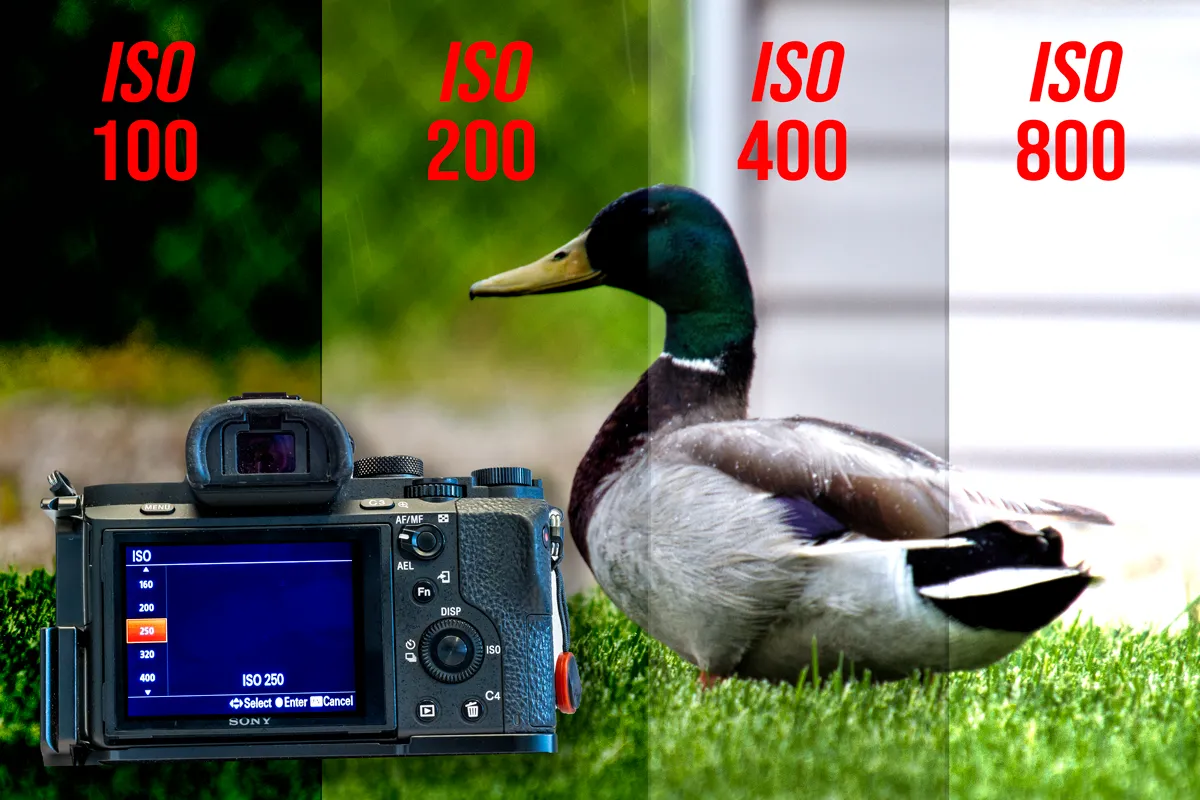
ISO is a setting that controls your camera’s sensitivity to light. It’s a term that comes from film photography, but it’s just as relevant in the digital age.
A lower ISO number means your camera is less sensitive to light, while a higher ISO number means it’s more sensitive. Most smartphones automatically adjust the ISO for you, but you can also manually adjust it in your camera settings.
Increasing the ISO can help you take clearer photos in low-light conditions without using a flash. However, a higher ISO also increases the amount of “noise” or grain in your photos, which can reduce image quality. Therefore, it’s best to keep your ISO as low as possible and only increase it when necessary.
White Balance: Keeping Colors True
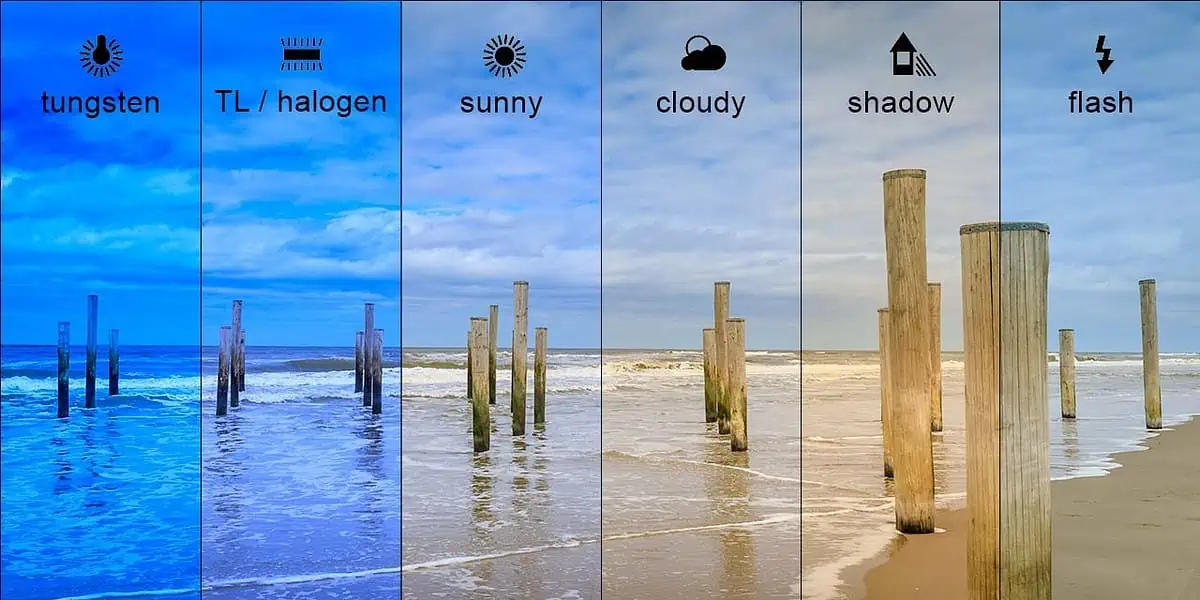
White balance is a setting that affects how colors appear in your photos. It’s designed to compensate for the different colors of light we encounter in different environments.
For example, indoor lighting often has a yellow or orange tint, while outdoor lighting can be bluer. If your camera didn’t adjust for these differences, colors in your photos would look strange. White objects might look yellow under indoor lighting or blue in the shade.
Most smartphones automatically adjust the white balance for you, but you can also manually adjust it in your camera settings. This can be useful if you’re finding that your photos are coming out with an unwanted color cast.
Aspect Ratios: Framing Your Photos
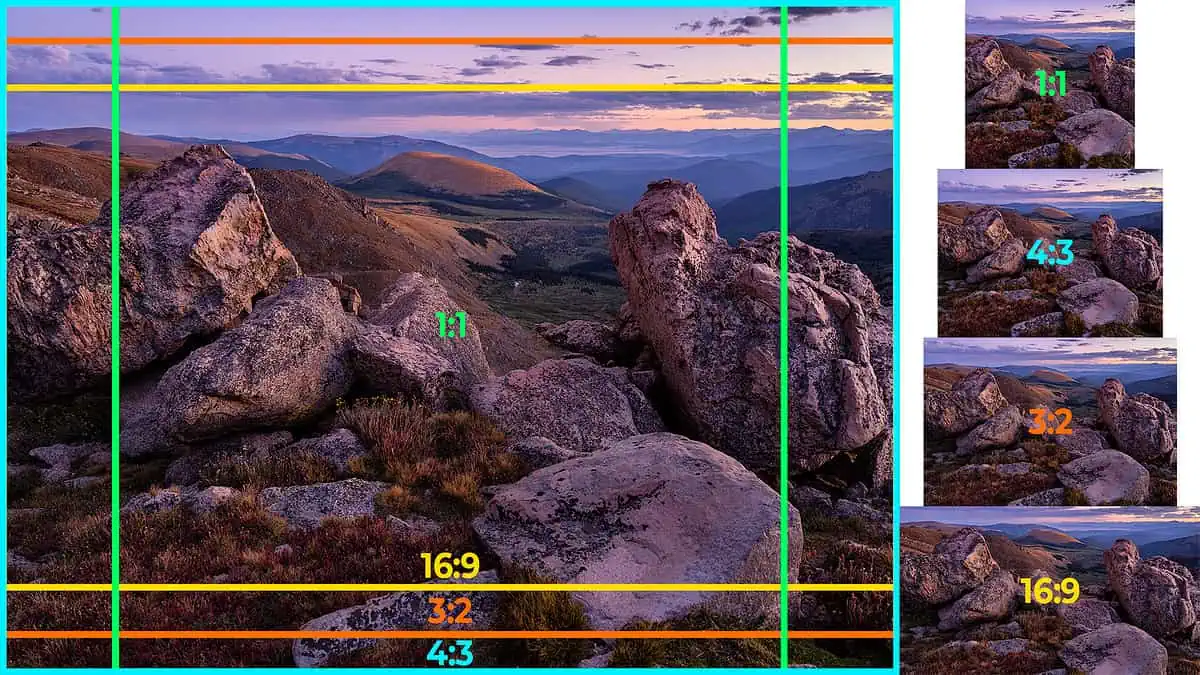
The aspect ratio of a photo is the ratio of its width to its height. Common aspect ratios for smartphone cameras include 4:3 and 16:9.
The aspect ratio you choose will depend on what you’re planning to do with your photo. If you’re planning to print your photo, a 4:3 aspect ratio is often a good choice, as this is the aspect ratio of most print sizes. If you’re planning to share your photo on social media, you might choose a different aspect ratio to fit the platform’s guidelines.
Pro Mode: Taking Control of Your Photography
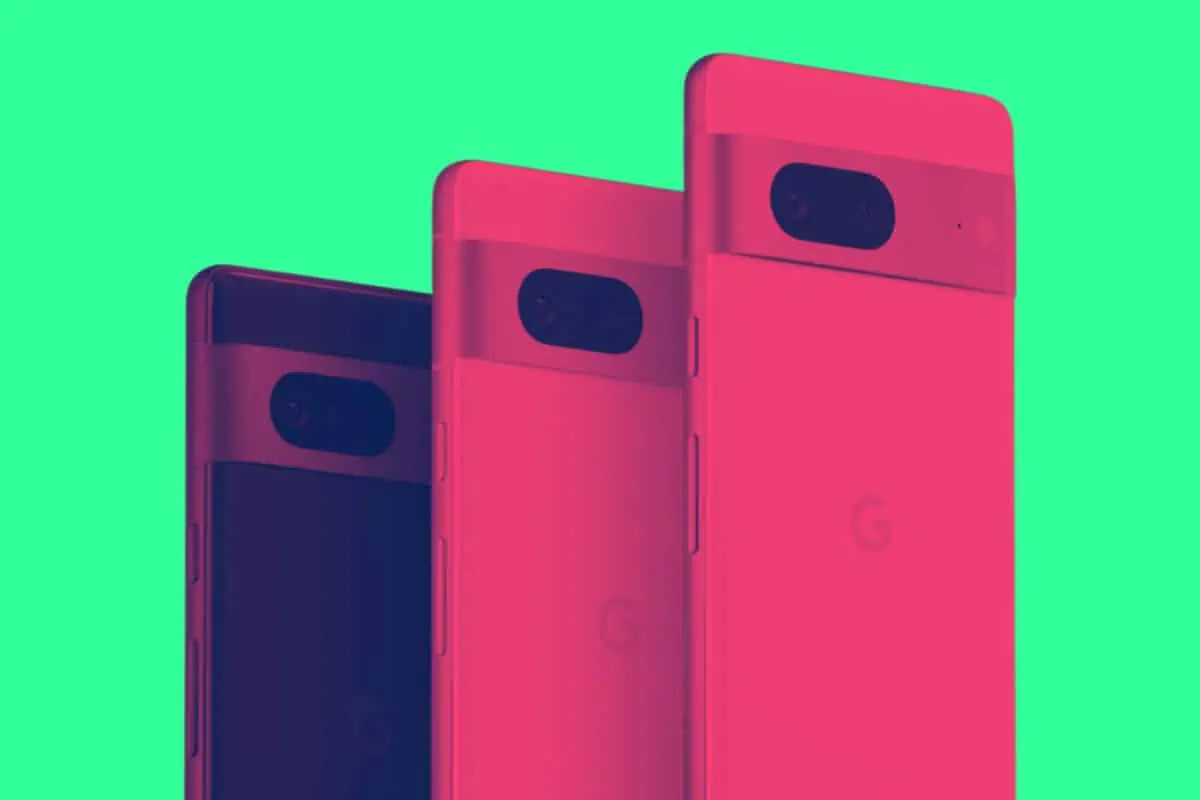
Many smartphones offer a Pro or Manual mode in their camera settings. This mode allows you to manually adjust all the settings we’ve discussed, giving you complete control over your photography. The iPhone 13 Pro Max has an entire suite of photography technologies baked into it.
While Pro mode can be intimidating for beginners, it’s a powerful tool once you understand how to use it. By manually adjusting your camera settings, you can fine-tune your photos to look exactly how you want them to.
Professional Photography Tips
Understanding your smartphone’s camera settings is the first step to taking great photos. But there’s more to photography than just understanding your camera. Here are a few professional photography tips to help you take your smartphone photography to the next level:
- Composition is key: The way you arrange elements in your photo is just as important as your camera settings. Look for interesting lines, shapes, and patterns when composing your photo.
- Lighting matters: Good lighting can make or break a photo. Try to take photos during the golden hour (the hour after sunrise or before sunset) for the best natural lighting.
- Don’t forget to edit: Even the best photos can benefit from a little editing. Use your smartphone’s built-in editing tools to adjust the exposure, contrast, and colors in your photos.
- You can also seriously up your photography game by leveraging certain types of lens and camera accessories – here’s some of our favorites right now.
