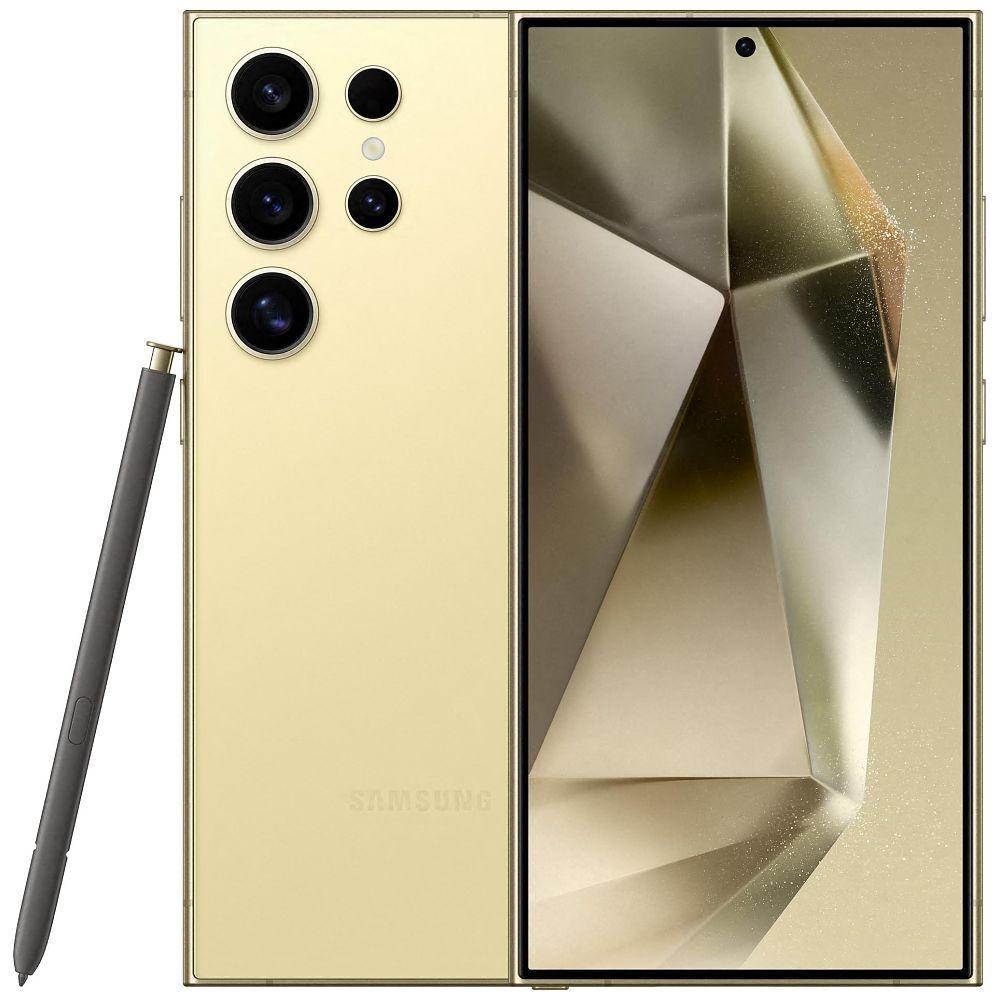
If you want to get the best performance out of your Samsung Galaxy S24 Ultra’s camera, your going to need to know which settings to use – here’s a checklist…
The Samsung Galaxy S24 Ultra is more than just a smartphone—it’s a powerful tool for capturing breathtaking photos and videos.
But, let’s be real, to truly unleash the beast, you need to know how to harness its camera features to their fullest potential.
Whether you’re chasing epic sunsets, jaw-dropping close-ups, or cinematic slow-mo videos, this checklist will take you from casual snapper to photo pro.
Get ready to explore every setting, every feature, and every hidden gem that will transform your shots into masterpieces.
Let’s unlock the full power of your Galaxy S24 Ultra by learning about and leveraging all of its best camera settings and features…
🎥 Best Samsung Galaxy S24 Ultra Camera Settings Guide
🔧 General Settings
- 📸 Set Picture Size to Highest Resolution (200MP for Main Camera): Maximize detail in your photos, especially for intricate scenes or cropping later.
- 🌄 Enable HDR (High Dynamic Range): Automatically balance bright and dark areas for better exposure in your photos.
- 🤖 Toggle Scene Optimizer On: Use AI to enhance your photos by recognizing scenes and optimizing settings accordingly.
- 🏃♂️ Enable Tracking Autofocus: Keep moving subjects in sharp focus, perfect for action shots.
- 📐 Turn On Grid Lines: Use grid lines to help compose your shots more effectively, following the rule of thirds.
📷 Camera Modes
- 🗂️ Arrange Modes for Quick Access: Place Pro Photo and Pro Video modes on the left and right sides respectively for easy access. You can do this by tapping “More” in the camera app and dragging the modes as desired.
- 📱 Access by Tapping Mode or Swiping Screen: Easily switch between camera modes by either tapping the mode or swiping across the screen.
📏 Resolution and Quality
- 🖼️ Choose Between 12MP, 50MP, and 200MP in Photo Mode: Use 12MP for everyday shots, 50MP for balanced quality and storage, and 200MP for maximum detail with a 4:3 aspect ratio.
- 🎥 Set Video Resolution to 4K 60fps or 8K 30fps: Choose 4K 60fps for smooth, high-quality footage, or 8K 30fps for the highest resolution available.
🎲 Pro Mode Settings
- 🔜 Enable RAW Format Capture: Capture all image data for more precise editing later, especially useful for professional photographers.
- ✍️ Manually Adjust Settings: ISO, shutter speed, white balance, focus, and exposure compensation for total creative control over your photos.
🔍 Zoom and Lens Settings
- 📷 Main Camera: Toggle Between 12MP, 50MP, and 200MP: Choose the resolution based on your need for storage or detail.
- 🌄 Ultra-Wide (13mm): Use for capturing expansive landscapes or large group shots, ensuring everyone and everything fits in the frame.
- 👤 3x Telephoto (67mm): Perfect for portrait shots, providing natural framing and a pleasing background blur.
- 🏞️ 5x Telephoto (111mm Periscope): Utilize the new 50MP sensor for improved quality when zooming in on distant subjects. Use the zoom slider for precise control.
🎞️ Video Settings
- 🎥 Enable 4K 120fps in Pro Video or Slow Motion Mode: Capture incredible slow-motion footage, ideal for fast-paced action or artistic shots.
- 🐢 Use “Adjust Speed” in Gallery for Slow-Motion Effects: After recording, adjust playback speed in the gallery for dramatic slow-motion effects.
🌃 Night Mode
- 🌙 Use Night Mode for Low-Light Scenes: Automatically adjusts settings to capture brighter, more detailed photos at night.
- 💻 Keep Device Steady or Use a Tripod: For the best results, keep your phone stable to avoid blur during long exposure times.
🔮 Additional Features
- 🐢 Enable AI Slow Motion: Capture in real time and let AI add slow-motion effects after the shot, perfect for emphasizing movement.
- 🎁 Configure Single Take Mode: Capture multiple images and clips with one press, ideal for unpredictable moments where you want variety.
- 🔍 Use Focus Enhancer for Macro Shots: Automatically adjust focus for close-ups, but disable it when you want stronger bokeh effects for a more dramatic look.
📱 Camera Assistant App Settings
- 📥 Download Camera Assistant from Galaxy Store: Enhance your camera experience with additional features and controls.
- 🔄 Auto Lens Switching: On: Automatically switch between lenses based on shooting conditions.
- 🔄 Distortion Correction: On: Reduce distortion when using the Ultra-Wide camera, especially useful for architectural shots.
- ⚡ Quick Tap Shutter: On: Minimize shutter lag to capture moments faster.
- 🎯 Prioritize Focus Over Speed: On: Ensure subjects are sharp, even if it takes a moment longer to focus.
- 🔍 High Resolution Setting: Turn off Adaptive Pixel for improved details, particularly in well-lit conditions.
- 🌀 Picture Softening: Choose “Off” for maximum sharpness, or “Medium” if you prefer a softer look.
🌞 Situational Settings
- 🌞 Daytime: Use 12MP for moving subjects to reduce file size and processing time, or switch to 50MP or 200MP for stationary subjects to capture the finest details.
- 🌌 Nighttime: Stick to 12MP for better noise reduction and light capture, ensuring clearer low-light photos.
🔧 Post-Processing
- 🤖 AI-Enhanced Editing Tools: Let the AI adjust brightness, contrast, and sharpness for a polished look, making editing effortless.
- ☁️ Auto-Save to Samsung Cloud: Automatically back up your photos to keep them safe and accessible from anywhere.
How To Use All of Galaxy S24 Ultra’s Camera Settings & AI Features

Having a checklist is one thing, but knowing how to actually use those features is something else entirely. If you’re new to the Galaxy S25 Ultra or Samsung phones in general, you might not know how to perform all of the steps in the checklist.
If that’s the case, read on because we’ll walk you through each step in detail so you’ll know exactly what you’re doing when you’re exploring your Galaxy phone’s camera settings.
📍 Detailed Instructions for Samsung Galaxy S24 Ultra Camera Settings
🔧 General Camera Settings
- 📸 Set Picture Size to Highest Resolution (200MP for Main Camera):
- Open the Camera app.
- Tap on the settings icon (gear icon) in the top corner.
- Scroll down to “Picture Size” and select “200MP” for the main camera.
- 🌄 Enable HDR (High Dynamic Range):
- Open the Camera app.
- Tap on the settings icon (gear icon).
- Find “HDR” and toggle it to “Auto” or “On” for balanced lighting in your photos.
- 🤖 Toggle Scene Optimizer On for AI-Enhanced Photos:
- Open the Camera app.
- Tap on the settings icon (gear icon).
- Scroll to “Scene Optimizer” and toggle it on to let AI adjust colors, contrast, and brightness automatically.
- 🏃♂️ Enable Tracking Autofocus:
- Open the Camera app.
- Tap on the settings icon (gear icon).
- Find and enable “Tracking Autofocus” to keep moving subjects in sharp focus.
- 📐 Turn On Grid Lines for Better Composition:
- Open the Camera app.
- Tap on the settings icon (gear icon).
- Scroll down and turn on “Grid Lines” to help compose your shots using the rule of thirds.
📷 Camera Modes
- 🗂️ Arrange Modes for Quick Access:
- Open the Camera app and swipe to “More” to see all available modes.
- Tap “Edit” (pencil icon) to customize the layout.
- Drag “Pro Photo” and “Pro Video” to the desired positions for easy access.
- 📱 Access by Tapping Mode or Swiping Screen:
- Open the Camera app.
- Swipe left or right on the screen to quickly switch between different modes, or tap on the mode name directly.
📏 Resolution and Quality
- 🖼️ Choose Between 12MP, 50MP, and 200MP in Photo Mode:
- Open the Camera app.
- Tap on the resolution icon (typically located at the top of the screen).
- Select “12MP,” “50MP,” or “200MP” depending on your needs.
- 🎥 Set Video Resolution to 4K 60fps or 8K 30fps:
- Open the Camera app and switch to Video mode.
- Tap on the settings icon (gear icon).
- Under “Resolution,” select “4K 60fps” for smooth video or “8K 30fps” for maximum detail.
🎲 Pro Mode Settings
- 🔜 Enable RAW Format Capture:
- Open the Camera app and swipe to “Pro Mode.”
- Tap on the settings icon (gear icon).
- Toggle “Save as RAW” to capture uncompressed images for advanced editing.
- ✍️ Manually Adjust Settings:
- In Pro Mode, you can adjust settings manually using the on-screen sliders:
- ISO: Adjust to control the camera’s sensitivity to light.
- Shutter Speed: Set the exposure duration—longer for more light, shorter for fast motion.
- White Balance: Adjust to match the light source and keep colors accurate.
- Focus: Use manual focus for precise control, especially for close-ups.
- Exposure Compensation: Adjust brightness if the scene is too dark or bright.
🔍 Zoom and Lens Settings
- 📷 Main Camera: Toggle Between 12MP, 50MP, and 200MP:
- Open the Camera app.
- Tap on the resolution icon and choose the desired resolution based on your need for detail or storage space.
- 🌄 Ultra-Wide (13mm):
- Open the Camera app.
- Tap the “Ultra-Wide” icon (usually depicted as three trees) to switch to the 13mm lens for wide-angle shots.
- 👤 3x Telephoto (67mm):
- Open the Camera app.
- Tap the zoom button to switch to 3x zoom, ideal for portrait shots.
- 🏞️ 5x Telephoto (111mm Periscope):
- Open the Camera app.
- Tap the zoom button to switch to 5x zoom, or use the zoom slider for precise control over the zoom level.
🎞️ Video Settings
- 🎥 Enable 4K 120fps in Pro Video or Slow Motion Mode:
- Open the Camera app and switch to Pro Video or Slow Motion mode.
- Tap on the settings icon (gear icon) and select “4K 120fps” for high-quality slow-motion video.
- 🐢 Use “Adjust Speed” in Gallery for Slow-Motion Effects:
- Open the Gallery app and select your slow-motion video.
- Tap “Edit” and then “Adjust Speed” to modify the playback speed for dramatic effects.
🌃 Night Mode
- 🌙 Use Night Mode for Low-Light Scenes:
- Open the Camera app and tap the moon icon to activate Night Mode.
- Hold the phone steady or use a tripod for best results, as the camera will use longer exposure times to gather more light.
- 💻 Keep Device Steady or Use a Tripod:
- For clearer low-light photos, place your phone on a stable surface or use a tripod to avoid any movement during exposure.
🔮 Additional Features
- 🐢 Enable AI Slow Motion:
- Open the Camera app and switch to Slow Motion mode.
- Tap on the settings icon (gear icon) and enable “AI Slow Motion” to let AI add smooth slow-motion effects during post-processing.
- 🎁 Configure Single Take Mode:
- Open the Camera app and swipe to “Single Take” mode.
- Tap the shutter button once, and the camera will automatically capture multiple images and short clips for you to choose from.
- 🔍 Use Focus Enhancer for Macro Shots:
- Open the Camera app and move closer to the subject until Focus Enhancer activates automatically.
- Toggle Focus Enhancer off if you prefer stronger bokeh (background blur) for creative shots.
📱 Camera Assistant App Settings
- 📥 Download Camera Assistant from Galaxy Store:
- Open the Galaxy Store app.
- Search for “Camera Assistant” and tap “Install.”
- Open the app to access additional camera settings and features.
- 🔄 Auto Lens Switching: On:
- Open the Camera Assistant app.
- Toggle “Auto Lens Switching” on to automatically use the best lens for the current scene.
- 🔄 Distortion Correction: On:
- In the Camera Assistant app, find “Distortion Correction.”
- Toggle it on to reduce distortion, especially when using the Ultra-Wide lens.
- ⚡ Quick Tap Shutter: On:
- Open the Camera Assistant app.
- Enable “Quick Tap Shutter” to minimize lag when taking photos.
- 🎯 Prioritize Focus Over Speed: On:
- In the Camera Assistant app, enable “Prioritize Focus Over Speed.”
- This ensures sharper focus, even if it takes slightly longer to capture the photo.
- 🔍 High Resolution Setting:
- Open the Camera Assistant app.
- Turn off “Adaptive Pixel” for improved detail retention, particularly in well-lit conditions.
- 🌀 Picture Softening:
- In the Camera Assistant app, find “Picture Softening.”
- Choose “Off” for maximum sharpness, or “Medium” if you prefer a slightly softer look.
🌞 Situational Settings
- 🌞 Daytime:
- For moving subjects, use “12MP” to reduce file size and processing time.
- For stationary subjects, switch to “50MP” or “200MP” to capture more details.
- 🌌 Nighttime:
- Stick to “12MP” for better noise reduction and light capture, ensuring clearer low-light photos.
🔧 Post-Processing
- 🤖 AI-Enhanced Editing Tools:
- Open your photo in the Gallery app.
- Tap “Edit” and use the AI tools to automatically adjust brightness, contrast, and sharpness.
- ☁️ Auto-Save to Samsung Cloud:
- Open the Camera app and tap on the settings icon (gear icon).
- Scroll down to “Backup” and enable auto-save to Samsung Cloud or your preferred cloud storage to keep your photos safe.
Accessories To 10x Your Galaxy Phone Photography & Video
The Galaxy S24 Ultra’s camera is a beast. But if you want to take your photos and video to the next level, you’ll need some accessories. Here’s what we recommend right now.
Moment Lens Attachment: Enhance your photos with a wide-angle or macro lens.
DJI OM 5 Gimbal: Stabilize your videos for a professional look. Perfect for capturing smooth motion.
Joby GorillaPod: A flexible tripod that helps you take steady shots, even in challenging angles.
Buying tools
Thinking About Buying a Samsung Galaxy?
Compare current refurbished prices, see how it stacks up against alternatives, and avoid overpaying for the wrong model.
Recommended for this article