Anyone that runs a successful website knows that image optimization tools are essential. Regardless of the size of your WordPress site – be it a blog or an e-commerce site – one thing is of the upmost importance: SPEED.
In order to rank in Google, you site (or blog or store) needs to load fast. And I don’t just mean quick; I’m talking under-two-seconds-fast. And for that you’re going to need rock-solid hosting (we use Kinsta). And a solid image compression tool. Which brings me to the point of this review – ShortPixel.
ShortPixel Review – The Best WordPress Image Compression Plugin

Before taking over KYM, I learnt a lot of lessons running another site, my side-hustle. The biggest lesson, however, was just how much speed can affect your SEO rankings. Back in August 2018, one of my sites got SMASHED by Google’s MEDIC and ended losing around 60% of its rankings.
I had multiple specialists in to look at the site, and they all said more or less the same thing: you can’t do anything about MEDIC. I knew this was typical SEO bulls**t, so I kept on looking. Eventually, I found a proper SEO and he pointed the issue out right away – my site was too damn slow (I’m talking page-load speeds of 8+ seconds).
Working with this guy, I learned about speed – how it’s achieved, what you can and can’t do, and what you NEED running on your site, as well as what you don’t (stop installing useless WordPress plugins!). But the two big takeaways were Kinsta for hosting and ShortPixel to tackle the large amount of images I had on my site.
How ShortPixel Works
ShortPixel is a wonderfully designed piece of software. From the installation to the actual optimisation process, you don’t really have to do anything. Once you’ve installed the plugin and connected it using your API, all you have to do is open the plugin, select ShortPixel Bulk option, and watch it steamroll through your images.

Depending on how many images you have, this process can take anywhere from 30 minutes to 30 hours. On KYM, for instance, we have A LOT of images, so ShortPixel is taking its time. It has thousands of images to process and optimise, so on this site, yeah, it takes awhile. On a relatively new, small blog you’d be done in minutes.
When it comes to processing (or crunching) the images on your site, you have three options, which I’ll detail below:
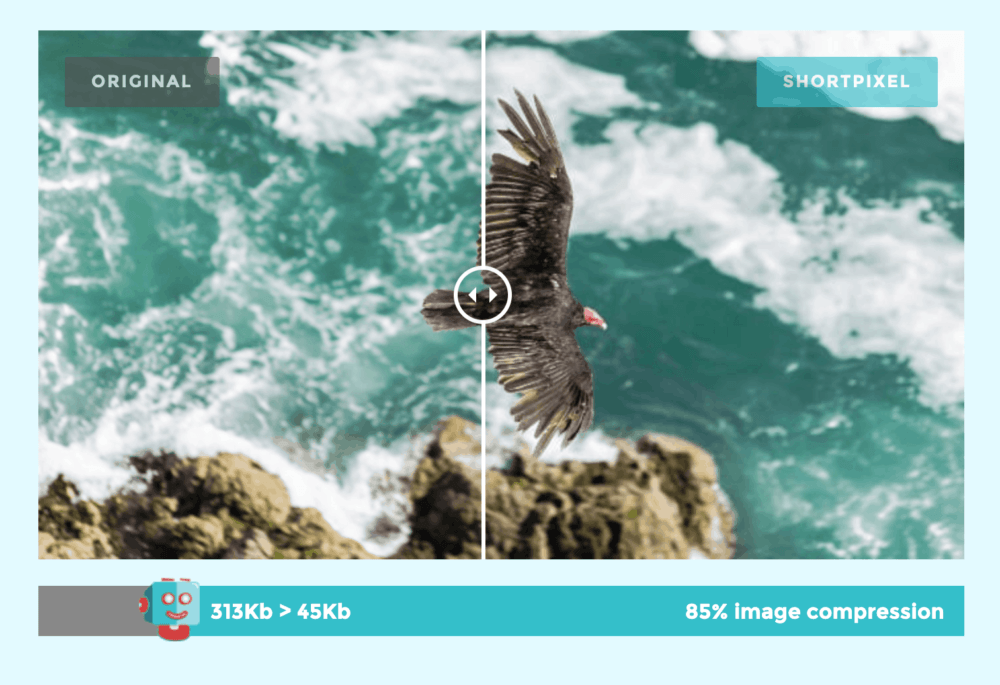
- Lossy – This is the best option for 99.9% of users. It processes the images with an algorithm that gets your images as small as possible without losing any perceivable quality.
- Glossy – This one is for sites that want to keep the quality and size of their images more or less the same, just with some slight compression applied.
- Lossless – This one ever-so-slightly reduced the footprint of each image on your site. Quality remains identical, but the footprint (meaning the size-burden) of the image is slightly reduced.
What Formats Does ShortPixel Optimize?
Images are one thing, but most sites run a combination of all sorts of media files, from JPGS to gifs to PNG files. Thankfully, ShortPixel will gobble them all up without breaking a sweat. Hell, it’ll even do PDF files, if that’s your thang.
Out of all the image compression tools I’ve tried, and there were quite a few, including Smush Pro, nothing comes close to the level of coverage ShortPixel provides. And it doesn’t stop there either; all images are compressed and processed on ShortPixel’s cloud server, so there is no additional strain applied on your server when it’s running.

Once an image as been optimised by ShortPixel on its cloud server, the old, bloated image file is replaced by a lightweight ShortPixel version. Do this thousands of times for every image on your site and you’ll be shaving seconds off of your site’s load times. If you want you old images, you can choose to back them up as well – I never bother with this though.
There are no file size limits either; it doesn’t matter if an image is 16GB or 2MB, ShortPixel will optimize it for speed and performance. And once it’s finished running, it’ll turn its attention to any new images that are uploaded your site, meaning you never have to worry about resizing images.
Setting Up ShortPixel – Installation Guide
Setting up and running ShortPixel is super simple. In fact, the entire process can be broken down into several steps:
- Sign-Up For ShortPixel Account, Pick A Plan, Get Your API Code
- Download The WordPress Plugin & Install It
- Open Plugin & Enter Your API
- Go To Plugin & Select ShortPixel Bulk
- Hit Start & You’re Done
How Much Does ShortPixel Cost?
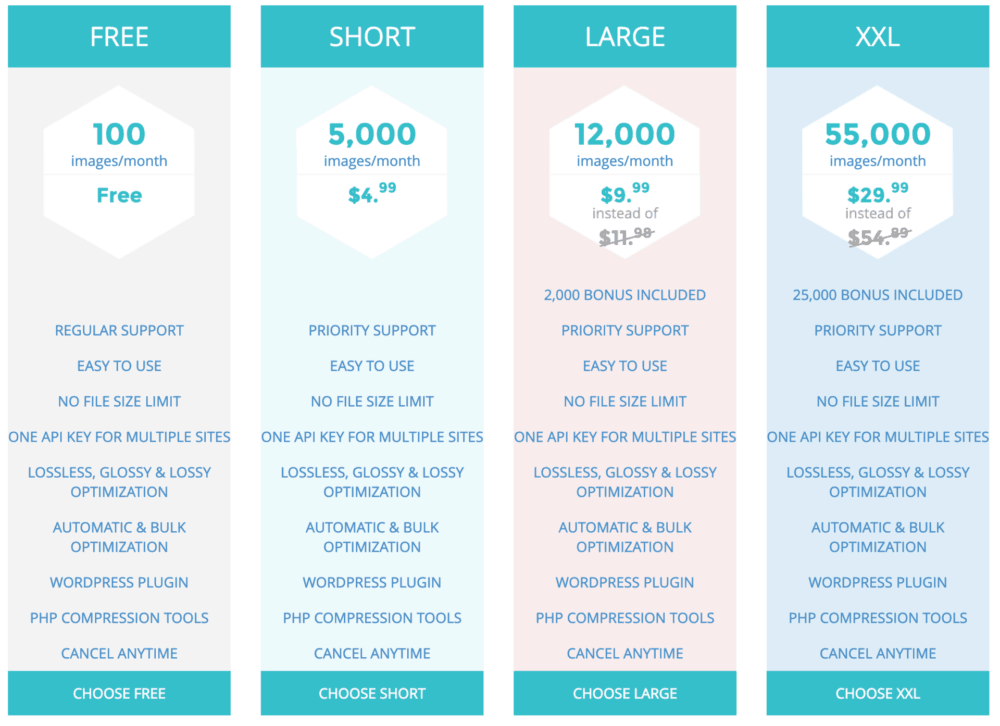
Considering how sophisticated ShortPixel is, the pricing options are no way near what you’d imagine them to be. ShortPixel works on packages, so you only have to pay for as much as you need. They even do a free option, which will optimize just 100 images. Here’s a breakdown of ShortPixel’s pricing brackets:

Verdict – Should You Get ShortPixel For Your WordPress Site?
In a word: YES. If you want a speedy, well-optimized WordPress site that runs at optimal speed, you simply cannot do without a tool like ShortPixel. Within hours of installing it, depending on how many images you have, it will shave seconds of your load times.
ShortPixel is simple to install and use too; even someone with little to no knowledge of WordPress could get it up and running with zero fuss. All you need is the API and the plugin and ShortPixel will do the rest, chomping down your images.
The ability to choose what style of compression you want is a true USP as well because if, for example, you’re a photographer and you want high quality images on your site, you can choose Glossy and keep everything as is, just with a slight reduction in footprint size.
For most, though, Lossy will suffice. It’s the most dramatic of the compression algorithms, but it will yield the best possible results (meaning the most improvements in site speed). If you’re even remotely serious about succeeding with your WordPress site, you really cannot live without a plugin like ShortPixel.


