If you want to get the best performance out of your iPhone 16 Pro Max camera, you NEED to know which settings to use – here’s a complete checklist
📷 Checklist For Best iPhone 16 Pro Max Camera Settings 🎭
🛠️ General Settings
- Go to Settings > Camera > Formats
- Set Camera Capture to “High Efficiency”
- Set Photo Mode to “24 MP”
- Enable “ProRAW & Resolution Control”
- Set Pro Default to “ProRAW (Up to 48MP)”
- Select “JPEG-XL Lossy” for ProRAW format
🧙🏼♂️ Advanced Settings
- Enable “Grid” and “Level” for better shot alignment
- Turn on “Portraits in Photo Mode”
- Enable “Prioritize Faster Shooting”
- Turn on “Lens Correction”
- Enable “Macro Control”
🖼️ In-Camera Settings
- Use the main 1x camera (wide lens) for the highest quality images
- Enable “Raw MAX” when shooting
- Avoid using digital zoom; move closer to the subject instead
🎥 Video Settings
- Set video recording to 4K at 24 or 30 fps
- Enable “Enhanced Stabilization”
- Consider turning off HDR video for easier post-processing
💎 ProRAW and Resolution
The iPhone 16 Pro Max can capture full 48-megapixel images in ProRAW format. The new JPEG-XL Lossy format reduces file sizes from 80-100MB to about 20MB without sacrificing quality.
💡 Photographic Styles
Try the new “Gold” photographic style for subtle enhancements to yellow tones. You can set this as the default style for all photos.
🎓 Additional Tips
- Avoid over-sharpening by shooting in RAW and adjusting sharpness during post-processing
- Use the Fusion camera feature to switch between 24mm, 28mm, and 35mm focal lengths
- Experiment with the new customizable Action button for quick camera access
📷 By using these settings, you can achieve the highest quality images with your iPhone 16 Pro Max! Feel free to adjust settings based on your personal style and preferences.
How To Adjust iPhone 16 Pro Max Camera Settings: A Beginner’s Guide…
Having a checklist is one thing. Knowing how to actually do the steps is something else entirely. If you’re new to iPhone – or the iPhone 16 Pro max – you might not know how to perform all of the steps in the checklist.
If that’s the case, read on because we’ll go through each step in detail so you know exactly what you’re doing when you’re tinkering with your iPhone’s camera settings.
Setting Formats In iPhone Camera App
Head to your camera settings and tap on ‘Formats’. Here, you’ll see two options: ‘High Efficiency’ and ‘Most Compatible’.
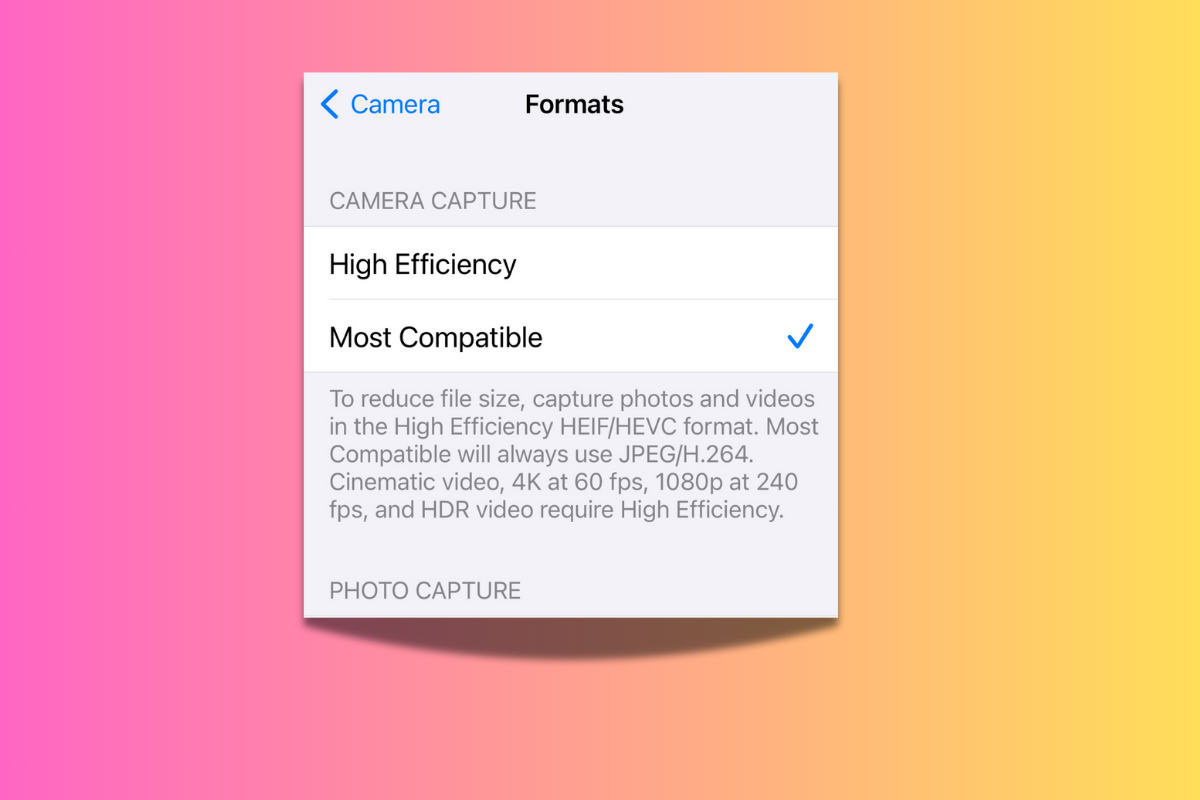
Choose ‘High Efficiency’. This option uses advanced compression technology to store photos and videos in a way that uses much less space while retaining impressive quality. It’s ideal if you want to make sure you have enough room for all your photos without compromising too much on image quality.
By selecting ‘High Efficiency’, your photos will be saved in the HEIF/HEVC format, which takes up significantly less space compared to traditional formats like JPEG. It’s perfect for anyone who likes to take lots of pictures but doesn’t want to run out of storage.
Set Photo Mode to 24 MP
Next, go to the ‘Photo Mode’ section. Here, you want to set your photo resolution to 24 megapixels. This setting is a great balance between quality and file size.
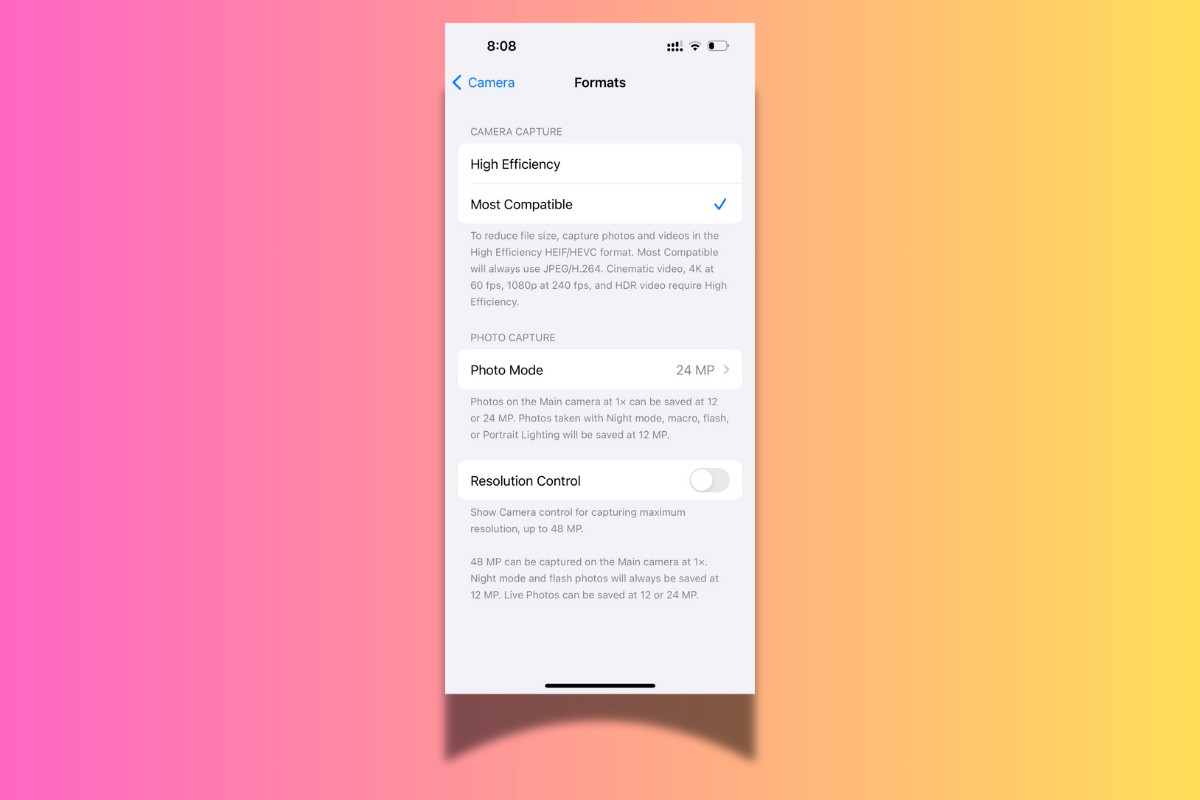
A 24MP photo will have plenty of detail for most uses, including social media, family photos, and even prints. It’s a great choice if you want better-looking photos than the default setting without using up too much storage space.
If you’re new to photography, think of megapixels as the amount of detail your camera captures. More megapixels mean sharper images, especially when zoomed in or blown up. The 24 MP setting is a sweet spot for beginners who want quality without overwhelming file sizes.
Enable ProRAW & Resolution Control
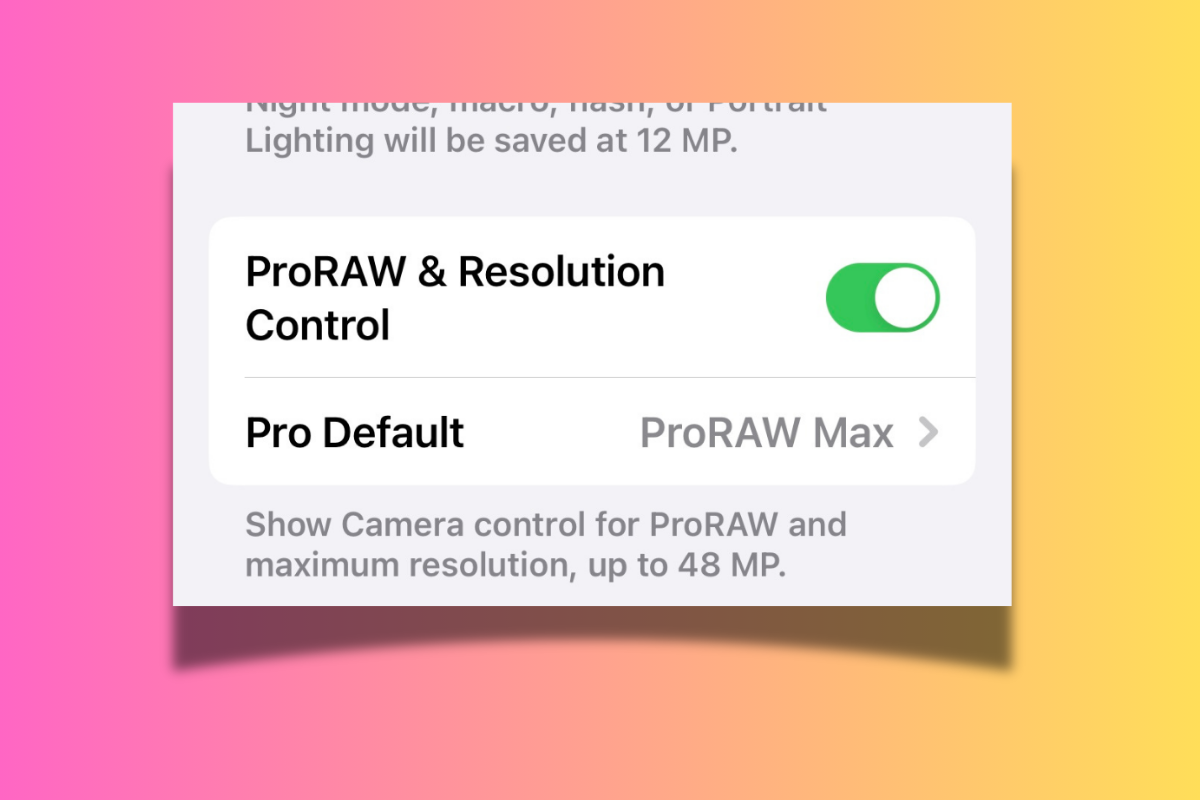
For even more control over your photos, you can enable ‘ProRAW & Resolution Control’. To do this, just toggle on the option in the camera settings.
ProRAW is a feature that lets you capture photos in a format that’s perfect for editing.
Unlike regular photos, which have some processing applied automatically (like brightness and color adjustments), ProRAW images keep all the raw data. This means you have more flexibility to make your own edits later, using apps like Photos or Adobe Lightroom.
This is a great option if you’re getting into photo editing and want to make your shots look exactly how you imagine them. The ‘Resolution Control’ part lets you adjust how detailed you want your ProRAW images to be, giving you even more power over your photography.
Set ProRAW to Up to 48 MP
Lastly, under the ‘ProRAW’ settings, make sure to set the resolution to ‘Up to 48 MP’. This setting will let you capture photos with incredible detail, which is fantastic if you’re planning on making large prints or want the ability to crop your images without losing quality.
Keep in mind that 48 MP ProRAW photos take up more storage, so you might want to use this setting for special moments or when you know you’ll want to do a lot of editing.
ProRAW at 48 MP is like having a professional camera in your pocket. It gives you the highest possible resolution, which is perfect for capturing landscapes, special events, or any moment you want to remember in high detail.
Quick Tips for Different Scenarios
Here are some tips for common shooting situations where capturing a good shot can be more challenging than normal. To get the best possible image in these situations, just apply the tips below – you’ll notice a big difference.
- Low Light Shots: Use ‘Night Mode’ with the 1x wide lens for crisp low-light photos. Set ProRAW to retain all the light data.
- Action Shots: Enable ‘Enhanced Stabilization’ and use a higher frame rate like 60 fps when shooting video to reduce motion blur.
- Portraits: Use the ‘Portraits in Photo Mode’ option to add a natural bokeh effect and enhance your subject.
Troubleshooting Common Issues
If you’re having trouble with your iPhone 16 Pro Max camera, check out these common issues and their solutions:
- Blurry ProRAW Photos: Make sure ‘Lens Correction’ is enabled (it usually is as standard). It helps adjust for any warping in the image. But if you’re seeing wonky images, it is worth checking you haven’t disabled it by accident!
- HDR Video Editing Challenges: HDR videos can sometimes be difficult to edit. Turning off HDR on videos that you KNOW will be getting lots of editing can (and will) save you a lot of potential headaches.
Helpful Camera Accessories
None of these are essential by any means, but if you’re looking to up your shooting game with iPhone, they can and will come in really useful:
- Moment Lens Attachment: Enhance your photos with a wide-angle or macro lens.
- DJI OM 5 Gimbal: Stabilize your videos for a professional look. Perfect for capturing smooth motion.
- Joby GorillaPod: A flexible tripod that helps you take steady shots, even in challenging angles.
Recommended Post-Processing Apps
After capturing beautiful ProRAW images, editing them is key to making them shine. Here are some post-processing tips:
- Lightroom Mobile: Use the mobile version of Lightroom to adjust exposure, colors, and sharpness. ProRAW images retain a lot of data, which gives you flexibility when editing.
- Snapseed: This free app allows you to apply quick edits like brightness, contrast, and structure to bring out details in your shots.
Feel free to bookmark this page and come back whenever you need to refresh your iPhone 16 Pro Max camera settings!
